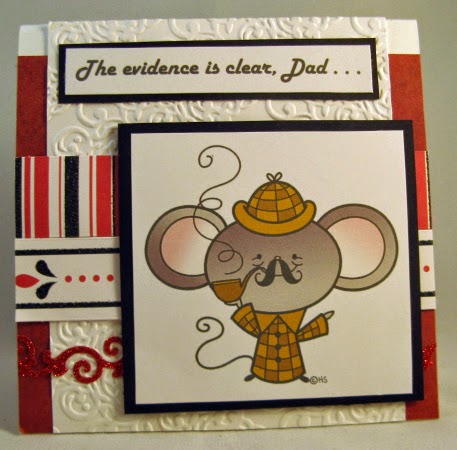
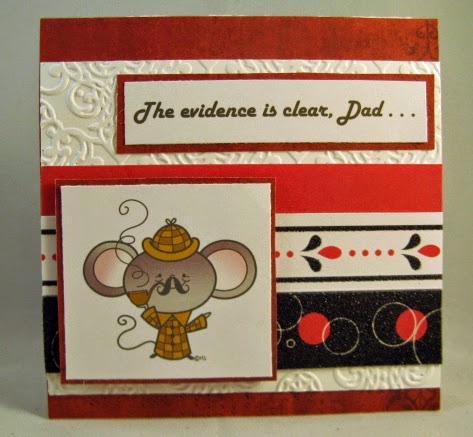
Today's goal is to color a digital image with some basic blending. For this tutorial, I am using 2 Cute Ink's Sherlock Mouse. Here is a pic of the first card - with steps following (as well as another card made with the same image).
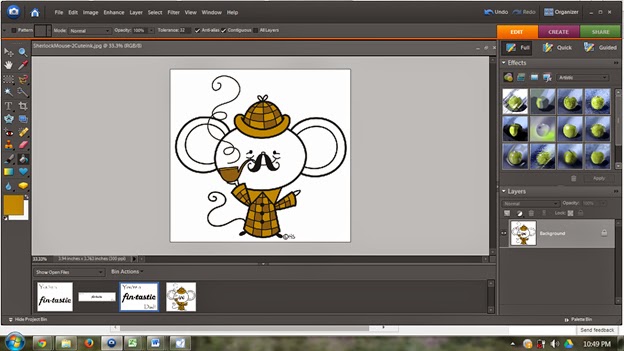
- Open your digital file. Crop the image if necessary.
- I used basic coloring techniques to color Sherlock's coat, hat, and pipe. Select your colors and use the Paint Bucket Tool to paint these items as desired.
 |
| Use Paint Bucket Tool to pain his coat, hat, and pipe. |

- The next thing I wanted to do was to color Sherlock - with a bit of blending on his ears and face. Select the two colors you want to use (I selected a light grey for the foreground color and a dark grey for the background color.)
- Next, you must select the area you want to color. On the left tool bar, select the Magic Wand Tool. (The icon looks like a magic wand.) Click anywhere inside the mouse's right ear - you will see the section outlined with a somewhat blinking dotted line.
- Chose the Gradient Tool on the left toolbar. Place the crossbar anywhere inside the blinking outline and drag to the other side of the ear. You should see the ear fill with a gradient color of the foreground and background. The ear should turn to shades of grey.

- Practice this type of blending - trying different directions. Practice dragging the color outside the ear. Remember, you can undo any change you make by immediately pressing Ctrl-Z.
- Once happy with the right ear, move to the left ear. You will see the left ear is actually divided by a line of smoke in the image. Therefore, when you use the Magic Wand Tool, you need to select BOTH sections of ear before coloring. To do this, select one section - hold the Shift key down - select the second section. Then use the gradient tool to color the left ear as you did with the right ear.

- Repeat the process for Sherlock's face.


- Change your foreground and background colors for the inside of Sherlock's ears - repeat the process.
- When satisfied, be sure to click SAVE AS . . . to save the image as a JPEG file with a NEW NAME. This way your original image from 2 Cute Ink stays pure and usable over and over again.
Specific questions about using 2 Cute Ink digital images with Photoshop? Feel free to ask those on my blog.
No comments:
Post a Comment
Thank You so much for leaving comments! Love to get your feedback!